Category: Design

Elegant living room professionally styled through a full service interior design project.

Your Full-Service Design Project: A Seamless Guide

Hiring a design firm can feel intimidating, surrounded by myths about losing creative control or going over budget. But a true partnership is the exact opposite. It’s not about a designer imposing their style on your home; it’s about bringing your unique vision to life with professional expertise. A full-service design project is a deeply collaborative experience where we act as your advocate, managing the endless details behind the scenes. Our role is to make the process feel transparent and exciting, ensuring the final space is a perfect reflection of you. Let’s clear up some common misconceptions and explore what this partnership truly looks like.

Key Takeaways

  • Streamline Your Project with a Single Partner: Full-service design means our team acts as your sole point of contact, managing every complex detail from architectural plans to final installation. This integrated approach ensures a cohesive process and a stress-free experience for you.
  • Your Vision is the Foundation: This is a collaborative partnership where your lifestyle and aesthetic guide every decision. We provide the expertise and structure, but your input is essential to creating a custom home that is a true reflection of you.
  • Benefit from Expertise and Exclusive Access: Investing in a full-service firm gives you access to trade-only vendors, skilled artisans, and professional project management. This ensures a higher quality, more unique result and maximizes the value of your investment.

What Does “Full-Service Interior Design” Really Mean?

Think of full-service interior design as the ultimate white-glove experience for transforming your home. It’s a comprehensive, end-to-end approach where our team manages every single detail of your project, from the initial creative vision to placing the final decorative accessory. Instead of you juggling architects, contractors, and vendors, we become your dedicated partner, ensuring a seamless and cohesive process. This allows you to enjoy the excitement of seeing your dream space come to life without the stress of managing the complex logistics that come with a large-scale renovation or new build. It’s a complete turnkey solution designed to deliver a home that is meticulously crafted, deeply personal, and ready for you to enjoy from the moment you walk through the door. Our goal is to handle the complexity so you can focus on the creative journey.

How One Team Manages Your Entire Project

With a full-service design firm, you have a single, dedicated team guiding your project from the first sketch to the final reveal. We serve as your sole point of contact, which streamlines communication and ensures every decision aligns with your overall vision. This model is built on a deep partnership, involving in-person consultations, regular site visits, and hands-on project management. Our role is to handle the complexities—coordinating with tradespeople, managing schedules, and overseeing every installation—so you don’t have to. This integrated approach guarantees that the design integrity is maintained throughout every phase, resulting in a beautifully cohesive and thoughtfully executed space.

What Can You Expect in a Full-Service Package?

A full-service package is all-encompassing, covering every element required to completely transform your home. It begins with a deep dive into architectural details and space planning to optimize the flow and function of every room. From there, we guide you through selecting all interior and exterior finishes, from flooring and paint to lighting and hardware. Our services also include designing and sourcing all furniture, textiles, and accessories, leveraging our exclusive relationships with artisans and suppliers. Behind the scenes, we provide comprehensive project management and procurement, handling all orders, tracking, and inspections, culminating in a turnkey installation where every piece is perfectly placed.

How It Differs from Traditional Interior Design

While traditional interior design often focuses on the decorative elements of a space—like selecting furniture, fabrics, and paint colors—full-service design takes a much more holistic view. It’s not just about how a room looks, but how it functions from the ground up. The distinction is crucial because it shifts the process from simply decorating a space to fundamentally shaping it. This involves a deeper level of project management and a strategic approach that considers the architectural integrity and practical viability of a design long before the first piece of furniture is chosen. It’s a shift from an aesthetics-first to a foundation-first mindset.

A Broader, More Integrated Scope

The most significant difference is the sheer breadth of responsibility. A traditional designer might be hired to furnish a room or consult on a color palette, but a full-service firm manages the entire ecosystem of your project. This means we coordinate not just with furniture vendors but also with architects, contractors, and specialized tradespeople, ensuring everyone is working in harmony toward a single, cohesive vision. This integrated model eliminates the communication gaps and logistical headaches that can derail a project. Instead of you acting as the go-between, we provide a streamlined project management experience, overseeing every detail from structural changes and permit applications to the final, picture-perfect installation.

Focus on Feasibility Before Aesthetics

Another key distinction is the order of operations. In a full-service model, we prioritize feasibility before we even begin exploring aesthetics. Before we talk about fabrics or finishes, we conduct a thorough assessment of the space to understand its structural possibilities and limitations. This involves creating detailed floor plans, evaluating the existing architecture, and establishing a realistic budget that aligns with your goals. This foundational work ensures that the creative vision is grounded in what is practical and achievable, preventing costly surprises or disappointments down the line. By addressing the planning phase with such rigor, we build a solid framework that allows the aesthetic elements to shine without compromise.

The Real Benefits of Full-Service Interior Design

Deciding to redesign your home is a major commitment, and the thought of managing every detail can feel overwhelming. Full-service interior design is about handing over the reins to a dedicated team that handles everything from the initial concept to the final, picture-perfect installation. It’s more than just decorating; it’s a comprehensive approach that ensures every element of your space works in harmony to support your lifestyle.

This level of service is perfect for those who value their time and want a truly custom result without the stress of managing a complex project. By partnering with a design firm, you gain a creative collaborator and a project manager who will advocate for your vision, solve problems, and bring your dream home to life. It’s an investment in a seamless process and a space that is thoughtfully and professionally executed down to the last detail.

Get a Custom Design That Reflects Your Style

Your home should be a direct reflection of your personality and lifestyle, not a copy of a showroom floor. The core benefit of full-service design is creating a space that is completely tailored to you. We go beyond surface-level aesthetics to understand how you live, what inspires you, and what you need your home to do for you. This deep understanding allows us to craft a turnkey solution where every choice—from the layout to the textiles—is made with your unique vision in mind. It’s a collaborative process that results in a cohesive, functional, and deeply personal environment that you simply can’t achieve with off-the-shelf solutions.

A Simpler, More Seamless Design Experience

A home renovation or redesign involves countless moving parts, from coordinating contractors to tracking orders and managing timelines. A full-service design firm takes on this complex role, offering comprehensive project management so you don’t have to. We handle all the logistics, including site visits, procurement, and troubleshooting any issues that arise along the way. This allows you to enjoy the creative journey without getting bogged down by the stressful details. Our job is to ensure the entire process feels smooth and exciting, culminating in a beautiful final reveal where all you have to do is walk in and enjoy your new space.

The Perks of Professional Connections and Pricing

Working with a design firm opens the door to a world of resources that aren’t available to the general public. We have long-standing relationships with trade-only vendors, skilled artisans, and custom furniture makers, giving you access to unique pieces that make your home truly one-of-a-kind. These industry connections often allow us to secure better pricing on high-quality materials and furnishings than you could find on your own. This access not only provides a wider, more curated selection of options but also ensures you receive the best possible value for your investment, resulting in a higher-end look that is built to last.

Access to a Trusted Network of Professionals

One of the most significant advantages of partnering with a full-service firm is gaining immediate access to our curated network of professionals. We’ve spent years building relationships with the best contractors, artisans, and trade-only vendors who are known for their reliability and exceptional craftsmanship. This saves you the time and stress of vetting countless individuals and ensures that everyone working on your home meets a high standard of quality. This trusted team works in sync, which means the execution of your design is seamless. Investing in a full-service firm gives you more than a design; it provides a complete, vetted team dedicated to bringing your vision to life with precision and care.

Avoiding Costly Redesigns and Mistakes

A well-planned project is a well-executed one. Our comprehensive approach is designed to catch potential issues long before they become expensive problems. By managing both the design and its implementation, we ensure that every detail is considered, from the structural feasibility of a new layout to the precise placement of electrical outlets for your lighting plan. This integrated process eliminates the communication gaps that often lead to costly errors or redesigns. When your design and construction oversight are handled by one team, you get clearer cost projections upfront and the peace of mind that comes with knowing an expert is sweating the small stuff for you.

How Your Full-Service Design Project Unfolds

Starting a design project can feel like a huge undertaking, but our full-service process is built to make it an inspiring and seamless experience. We handle every detail from the initial sketch to the final, perfectly placed accessory. Think of us as your dedicated partner, managing the entire project so you can enjoy the transformation without the stress. This is the highest level of service, where we provide a complete turnkey solution, leaving all the intricate work to our team of experts. Let’s walk through exactly what that looks like, step by step.

Step 1: Defining Your Vision

Everything begins with a conversation. This initial phase is all about you—your vision, your lifestyle, and how you want your home to feel. We’ll discuss your aesthetic preferences, functional needs, and project goals in depth. From there, we develop a comprehensive design concept complete with mood boards, color palettes, and preliminary sketches. This collaborative stage ensures we’re perfectly aligned on a creative direction that feels authentic to you before we move forward with any of the finer details. It’s the foundational step that sets the tone for your entire project and makes sure we get it right from the start.

Step 2: Perfecting the Layout and Details

Once the concept is approved, we get technical. This is where we map out the anatomy of your space to optimize its flow and function. Effective space planning ensures every piece of furniture is perfectly scaled and placed, creating a layout that feels both intuitive and beautiful. We also refine architectural details, considering everything from custom millwork and lighting placement to wall finishes and flooring transitions. This meticulous attention to the home’s structure is what creates a truly cohesive and custom-designed environment, turning a simple room into a thoughtfully crafted experience that works for your daily life.

Step 3: Selecting Finishes and Furniture

This is where your unique style truly comes to life. We draw on our extensive network of trusted artisans, vendors, and trade-only showrooms to source the perfect materials and furnishings for your home. We handle the selection of everything from fabrics and furniture to lighting and accessories, focusing on pieces that reflect your personalized style and are built for longevity. Our expertise allows us to find unique, high-quality items that aren’t available in retail stores, ensuring your space is filled with beautiful, durable pieces that tell your story and stand the test of time.

Step 4: Managing the Project from A to Z

A successful design project involves a lot of moving parts. Our team takes on the complex role of project management, handling all the logistics from start to finish. We create detailed timelines, coordinate with contractors and tradespeople, place and track all orders, and manage the budget. This behind-the-scenes work is a significant part of any full-service project and is crucial for keeping everything on schedule and running smoothly. We handle any challenges that arise, allowing you to relax, knowing every detail is being professionally managed by a team dedicated to your project’s success.

Step 5: The Big Reveal and Final Touches

The final step is the most exciting: the reveal. After all the planning, sourcing, and coordination, we manage the complete installation. This often happens over a few days, where our team oversees all deliveries, places every piece of furniture, hangs artwork, and styles every surface down to the last detail. We transform the empty space into the beautiful, functional home we designed together. You get to walk into a completely finished space, ready for you to live in and enjoy immediately. It’s the ultimate turnkey experience and the moment your vision becomes a tangible reality.

How Much Does Full-Service Interior Design Cost?

Let’s talk about one of the most important aspects of any design project: the budget. Thinking about the numbers can feel overwhelming, but creating a clear financial plan is the first step toward bringing your dream home to life without stress or surprises. A well-planned budget acts as a roadmap, guiding every decision we make together, from the architectural details down to the final finishing touches. It ensures the final result is not only beautiful but also a smart investment in your home and lifestyle.

At Freddie Ramon, we believe in complete transparency. We see ourselves as your partners and advocates, dedicated to honoring your financial commitment while delivering exceptional quality and design. Understanding how to allocate funds for design services, furnishings, and construction is key. We’ll walk you through the typical structure of a design budget, explain the factors that shape the final costs, and clarify how project timelines influence the payment process. This way, you can move forward with confidence, knowing exactly what to expect as we begin this creative process together.

Understanding the Guideline for Design Fees

When you’re first mapping out your finances, a helpful guideline to keep in mind is the 10% rule. Generally, you can expect professional design services to account for about 10% of your total project budget. This total budget includes everything—construction, materials, furnishings, and accessories. So, if you plan to invest $700,000 into your home renovation, you can anticipate that around $70,000 of that will be dedicated to the comprehensive services of your design team.

This rule is a great starting point for planning, but remember it’s an estimate. The percentage can shift based on the complexity and specific needs of your project. Think of it as a way to frame your initial budget conversations and set realistic expectations from the outset.

Key Factors That Affect Your Design Budget

Because every full-service design project is entirely custom, there isn’t a one-size-fits-all price tag. The final cost is shaped by several key factors, primarily the scope and complexity of your project. A simple room refresh will naturally have a different budget than a full-scale home renovation with custom millwork and structural changes. The size of your space and the level of detail involved also play a significant role.

To give you a clear and accurate picture, we provide a custom proposal after our initial consultation. This allows us to fully understand your vision, needs, and the unique characteristics of your home. This detailed estimate covers the creative direction, project management, and meticulous coordination that a full-service design firm provides, ensuring a seamless process and an outcome that truly reflects you.

What to Expect for Timelines and Payments

Full-service design is an immersive process that requires time to execute perfectly. Depending on the home’s size, the intricacy of the design, and coordination with builders and artisans, a comprehensive project can take anywhere from one to three years to complete. This extended timeline allows for thoughtful decision-making, sourcing one-of-a-kind pieces, and ensuring every detail meets our shared standard of excellence.

Understanding this timeline is crucial for budgeting, as payments are typically structured around key project milestones. Instead of a single lump sum, you can expect a payment schedule that aligns with the project’s progress, often starting with a retainer and followed by installments as we move through design, procurement, and installation. We’ll outline this schedule clearly from the beginning, so you can manage your finances comfortably throughout the entire journey.

Understanding Designer Hourly Rates

While some firms use a flat-fee structure, others work on an hourly basis. It’s helpful to know that designer fees can vary quite a bit across the industry. According to Houzz, rates can range from $75 to over $450 per hour, depending on the designer’s experience and location. This range reflects the level of expertise, reputation, and service you receive. A more established firm with a portfolio of complex, custom projects will naturally be at the higher end of that spectrum. This rate covers the immense amount of time dedicated to creative development, detailed planning, and the hands-on management required to execute a project flawlessly.

Typical Project Completion Times

True luxury design isn’t a rushed process; it’s a thoughtful and immersive experience. A comprehensive, full-service project requires time to get every detail just right. Depending on the size of your home, the complexity of the design, and the necessary coordination with builders and artisans, a project can take anywhere from one to three years to complete. This extended timeline is intentional, as it allows for careful decision-making, sourcing unique, one-of-a-kind pieces, and ensuring every element meets a shared standard of excellence. It’s this commitment to a meticulous process that results in a truly bespoke home built to last.

How to Choose the Right Interior Design Firm for You

Selecting a design firm is one of the most important decisions you’ll make for your home. You’re not just hiring someone to pick out furniture; you’re choosing a partner to bring your vision to life. The right firm will understand your lifestyle, respect your budget, and manage the countless details that go into a custom project. It’s a relationship built on trust, clear communication, and a shared aesthetic. When you find the right fit, the entire process feels less like a stressful renovation and more like a creative collaboration. To find that perfect match, focus on three key areas: their portfolio, their experience, and their communication style.

Does Their Portfolio Resonate With You?

Before you even pick up the phone, spend time with a firm’s portfolio. This is your best window into their creative world. As you browse their past projects, ask yourself if their style resonates with you. Do you see a consistent quality and attention to detail? While a versatile designer can adapt to different tastes, their underlying aesthetic should feel like a natural fit for your home. When you review a portfolio, look for spaces that you could imagine yourself living in. This initial connection is a strong indicator that the firm can translate your personal vision into a beautifully designed reality.

Check for Proven Experience and Credentials

Full-service interior design is a complex undertaking that requires a high level of expertise. Your design team will be managing everything from space planning and architectural details to coordinating with contractors and overseeing installation. This is where a firm’s experience becomes invaluable. Look for a team with a proven track record of managing projects similar in scope and scale to yours. Professional credentials and a history of successful, high-end custom work are strong signs that a firm has the skills and processes needed to deliver the quality you expect and handle the inevitable challenges that arise during a renovation.

Make Sure Your Communication Styles Click

A successful design project hinges on clear and consistent communication. From the very first consultation, pay attention to how the team interacts with you. Do they listen to your ideas? Do they ask thoughtful questions? A client-centered firm will prioritize understanding your needs and keeping you informed every step of the way. It’s helpful to ask about their communication process. Will you have a single point of contact? How often can you expect updates? Finding a team that values a collaborative relationship ensures your voice is heard and your vision is accurately brought to life, making the entire experience smooth and enjoyable.

Consider Their Geographic Scope

While technology allows designers to work from anywhere, there’s a distinct advantage to partnering with a firm that has a deep understanding of your local area. A designer’s grasp of regional influences—from the quality of natural light to the local architecture and lifestyle—can profoundly shape the final design. They understand how geography can influence design choices, from selecting materials that will withstand the climate to creating a home that feels authentically connected to its environment. Beyond aesthetics, a local firm offers significant practical benefits. They have an established network of trusted local contractors, artisans, and vendors, which is invaluable for a custom project. Their proximity also allows for frequent site visits, ensuring hands-on project management and a smoother process from start to finish.

How to Prepare for Your Full-Service Design Project

A successful design project is built on a foundation of clear communication and a shared vision. Before we begin selecting fabrics or drafting floor plans, taking time to prepare will make the entire process smoother and more enjoyable. Think of it as creating the roadmap that will guide us toward a beautiful, functional, and deeply personal space that you’ll love for years to come.

Clarify Your Goals and Ideal Timeline

The beauty of full-service design is that you’re hiring a team to manage every detail for you. It’s a complete turnkey solution where we handle the complexities, from sourcing to installation, so you don’t have to. Your primary role is to provide clear feedback and make timely decisions. It’s important to understand that custom design takes time. We’ll establish a realistic timeline with key milestones, but patience is essential as we coordinate with artisans, vendors, and contractors to bring your unique vision to life. This partnership ensures the final result is exactly what you dreamed of, without the stress of managing it yourself.

Think About How You Want the Space to Feel and Function

This is where the fun begins. Start gathering inspiration that speaks to you—whether it’s on Pinterest, in magazines, or from your travels. But beyond aesthetics, think about how you truly live in your space. Who uses the room, and for what activities? Do you need a cozy reading nook, durable fabrics for kids and pets, or smart storage solutions? We’ll guide you through key decisions on space planning, color palettes, and material selections. Creating a list of “must-haves” and “nice-to-haves” helps us understand your priorities and design a home that is not only beautiful but perfectly suited to your lifestyle.

Finalize Your Budget and Prep Your Space

A clear and realistic budget is one of the most important tools for a successful project. It allows us to make strategic decisions and source the best possible options without compromise. Be upfront about your investment level, including your non-negotiables—the key pieces or features you absolutely want to include. A comprehensive budget should account for all elements, including furnishings, materials, contractor fees, shipping, and our design fee. By establishing this from the start, we can honor your financial comfort zone and focus our creative energy on designing a space that delivers incredible value and exceeds your expectations.

2 Common Myths About Full-Service Design, Busted

The idea of full-service interior design can feel a bit intimidating if you’ve never worked with a firm before. It’s a significant investment of trust and resources, and it’s completely normal to have questions about how it all works. Unfortunately, there are a few persistent myths that can cause hesitation. These misconceptions often paint a picture of a process that’s rigid and impersonal, which couldn’t be further from the truth.

Let’s clear the air and talk about what a true full-service partnership looks like. The goal isn’t for a designer to impose their style on your home; it’s to create a collaborative environment where your vision is brought to life with professional expertise and seamless execution. We handle the logistics, the endless details, and the complex coordination so you can focus on the excitement of your home’s transformation. Think of us as your dedicated partner and advocate, guiding your project from a simple idea to a beautifully realized space that feels entirely like you.

Fact: It’s a Collaboration, Not a Takeover

This is probably the most common concern we hear, and it’s completely understandable. The fear is that hiring a full-service designer means signing away your personal style and getting a home that reflects the designer, not you. In reality, our process is the exact opposite. A full-service project is a deep collaboration. You are the expert on your life, your tastes, and how you want your home to feel. We are the experts in translating that vision into a functional, beautiful reality. We provide a complete turnkey solution, but your input is the essential ingredient that guides every decision, from the initial floor plan to the final fabric selection.

Fact: We’re Your Financial Advocate

Another major worry is that a designer will push you past your financial comfort zone. A true professional, however, sees your budget as a foundational element of the design, not a suggestion to be ignored. One of the first things we do is discuss budget constraints to ensure we’re all aligned from day one. Our job is to be creative and resourceful within the financial framework you provide. We act as your project’s financial stewards, making strategic decisions to maximize every dollar. In many cases, our industry relationships and access to trade-only sources can even help your budget go further than it would on your own.

Is Full-Service Design Right for You?

Deciding on the right level of design service can feel like the first big commitment of your project. While different projects have different needs, full-service interior design offers a comprehensive, hands-on approach that transforms a house into a home with minimal stress for you. It’s about more than just picking out furniture; it’s a partnership dedicated to bringing a complete, cohesive vision to life. If you’re wondering whether this all-inclusive approach fits your lifestyle and project goals, let’s explore what it means to invest in a full-service package and the lasting value it brings.

Signs You’re Ready for a Full-Service Designer

A full-service package is ideal when you’re looking for a complete, end-to-end design experience. Think of it as the ultimate white-glove service. This is the perfect fit if you’re building a new home, planning a large-scale renovation, or furnishing an entire residence from the ground up. It’s also designed for busy professionals and families who value their time and want an expert to manage the countless details that go into a design project. When you hire a designer for a complete turnkey solution, you’re entrusting them with everything from the initial concept to the final installation, allowing you to enjoy the process without the logistical headaches.

You Prefer to Hand Off Complex Project Management

Let’s be honest: a successful design project involves a staggering number of moving parts. From creating detailed timelines and coordinating with tradespeople to placing and tracking every single order, the logistics can easily become a full-time job. If the thought of managing those details feels more stressful than exciting, a full-service approach is designed for you. Our team takes on the complex role of project management, handling all the behind-the-scenes work so you can stay focused on your vision. We act as your sole point of contact, which streamlines communication and guarantees the design integrity is maintained from start to finish.

Look at the Long-Term Value, Not Just the Price Tag

Unlike à la carte or e-design services that might focus on a single room or specific elements, full-service design addresses every layer of your home’s interior. This includes crucial steps like space planning, architectural details, and selecting all materials, finishes, and furnishings. While the initial investment is higher, the long-term value is immense. A cohesive, professionally executed design not only creates a personalized sanctuary but also adds significant value to your property. By focusing on quality and longevity, this approach ensures your home is not only beautiful today but remains timeless and functional for years to come.

When This Approach is Necessary

While full-service design is a luxury for some projects, it becomes a necessity for others. When you’re moving beyond simple cosmetic updates and into the realm of significant renovations, the complexity multiplies. Juggling architects, contractors, and various tradespeople can quickly become a full-time job, filled with potential for miscommunication and costly errors. This is where a full-service approach is no longer just a convenience—it’s the framework that protects your investment, your timeline, and your sanity. For certain projects, having a single, dedicated team managing every detail is the only way to ensure a seamless process and a beautifully cohesive result.

For Projects with Structural Changes

If your project involves moving walls, reconfiguring a floor plan, or adding an extension, full-service design is essential. These types of structural changes require a deep integration of design and construction from the very beginning. Our team acts as your sole point of contact, managing every complex detail from the initial architectural plans to the final installation. This unified approach ensures that the creative vision is always aligned with what’s structurally feasible, preventing the kind of communication breakdowns that can derail a project. It’s about creating a stress-free experience for you, where every decision is made cohesively, resulting in a space that is both beautiful and intelligently built.

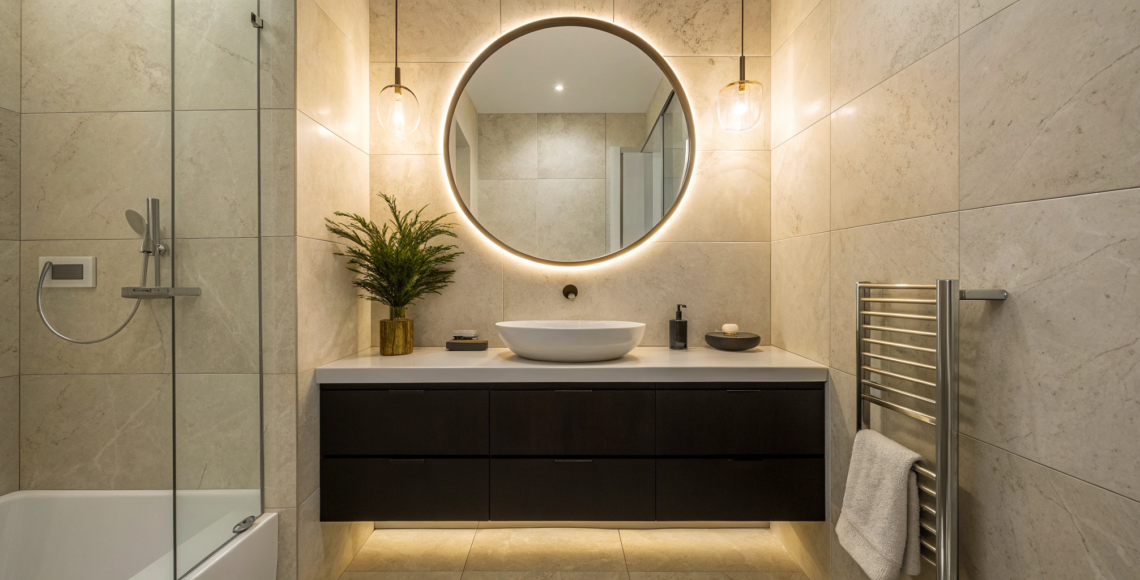
For Kitchens, Bathrooms, and Older Homes

Renovating kitchens, bathrooms, and older homes presents a unique set of challenges. These spaces are packed with complex systems—plumbing, electrical, and ventilation—that all need to work in perfect harmony. Full-service design ensures your creative ideas are actually possible within the building’s existing framework, which is especially crucial in older Las Vegas homes that often hide structural surprises. With a single, dedicated team guiding your project from the first sketch to the final reveal, we can make bigger, more custom changes happen. This integrated management allows us to seamlessly blend innovative design with meticulous craftsmanship, transforming the most functional rooms in your house into sophisticated, personal spaces.

Making Your Design Partnership a Success

Hiring a full-service interior design firm is a significant investment in your home and your quality of life. While the goal is to hand over the heavy lifting, your collaboration is the secret ingredient that makes the final result truly feel like you. Think of it as a partnership. We bring the expertise, resources, and project management, but your vision, feedback, and decisions are what guide the process and shape the outcome.

The best way to maximize your investment is to be an engaged and informed partner. It starts with understanding what a complete turnkey solution really means. You won’t be sourcing tile or scheduling contractors, but you will be the ultimate decision-maker. A great design firm will present you with curated options that fit your aesthetic and budget, making it easy for you to give the green light. By understanding the scope of the project and your role within it, you can help ensure every dollar is spent creating a space that you’ll love for years to come.

Communication is Key to a Great Result

Clear and open communication is the foundation of a successful design project. From the very beginning, you should feel comfortable asking questions and sharing your thoughts. A professional design firm will establish a clear communication plan, so you always know who to talk to and when to expect updates. Having a single point of contact streamlines this process, preventing confusion and ensuring nothing gets lost in translation. Our goal is to make you feel heard and supported every step of the way. Don’t hesitate to express your preferences or concerns—your honest feedback is essential for us to create a home that perfectly reflects your personality and lifestyle.

Be Prepared to Make Timely Decisions

In any design project, momentum is key. One of the biggest factors in keeping a project on schedule is timely decision-making. From approving floor plans to selecting the final piece of hardware, each choice you make allows the next phase of work to begin. We understand these decisions can feel big, which is why our well-defined process is designed to give you all the information you need to feel confident and clear. We’ll present you with options, explain the pros and cons, and offer our professional recommendation. By providing your input within the planned timeline, you help us keep the entire project moving forward seamlessly, avoiding costly delays and ensuring a smooth journey to your beautiful new space.

Frequently Asked Questions

What is my role during the project? I’m busy, so how much of my time will this take? Think of your role as the visionary and the ultimate decision-maker. Our job is to handle all the complex logistics, coordination, and day-to-day management so you don’t have to. Your time is primarily needed during our key creative meetings to establish the vision and at specific points to approve designs and selections. We streamline the process by presenting you with curated choices, making it easy for you to give clear feedback and keep the project moving forward without it taking over your life.

Can I incorporate existing furniture or art that I love into the new design? Absolutely. A home should tell your story, and cherished pieces are a huge part of that. We see it as a welcome creative challenge to design a new space around the items that hold meaning for you. We will thoughtfully integrate your existing furniture, art, or heirlooms, ensuring they feel intentional and harmonious within the new, cohesive design we create together.

How is the design fee structured? Is it separate from the budget for furniture and materials? Yes, it’s helpful to think of them as two separate components. The design fee covers our team’s expertise, creativity, and the comprehensive project management required to execute your project from start to finish. The furnishings budget is the separate amount allocated for all the physical items going into your home, such as furniture, lighting, textiles, and accessories. We establish both clearly at the beginning to ensure complete financial transparency.

Why does a full-service project take so long to complete? A longer timeline is a sign of a truly custom, high-quality project. Much of the time is dedicated to things that happen behind the scenes, like creating detailed architectural drawings, waiting for custom-made furniture from artisans, and coordinating schedules with the best contractors and tradespeople. This deliberate pace ensures that every single detail is thoughtfully considered and perfectly executed, which is essential for achieving a lasting, high-end result.

I’m only redoing a couple of rooms, not a whole house. Is full-service design still a good fit? While full-service design is perfect for new builds and large-scale renovations, it can also be the right choice for significant multi-room projects. If you’re looking for a cohesive transformation of a kitchen and living area, for example, and want a dedicated team to manage every detail from construction to final styling, then our full-service approach is a great fit. It’s less about the number of rooms and more about the desire for a comprehensive, professionally managed process.

Related Articles

Chic small bathroom wall idea with large tiles, a backlit mirror, and a wall-mounted vanity to save space.

Small Bathroom Wall Ideas That Create Space

A small bathroom is your chance to make a big statement. Forget the limitations—think concentrated impact. Your walls are the canvas for creating a personal, luxurious space. A bold small bathroom wall can handle dramatic color, rich texture, and sophisticated patterns with surprising grace. Think large-format tiles for a seamless look or a single accent wall in a deep hue for added depth. We’ve gathered our favorite ideas that go beyond the basics, helping you turn your walls into the room’s most compelling feature, no matter the square footage.

Key Takeaways

  • Create an Illusion of Space: Employ light-reflecting paint finishes, large-format tiles, and oversized mirrors to visually push back walls and make the room feel brighter and more expansive.
  • Prioritize Smart Functionality: Maximize every inch by using vertical storage like floating shelves and wall-mounted vanities, and protect your investment by selecting durable, waterproof materials for high-moisture zones.
  • Layer Thoughtful Details for a Custom Look: Introduce sophistication by layering multiple light sources, like sconces and backlit mirrors, and adding character with subtle patterns or textures that provide depth without clutter.

Popular Trends to Inspire Your Design

When designing a small bathroom, current trends can be a fantastic starting point for inspiration. The key is to adapt these ideas to fit your personal style and the unique character of your home. Think of trends not as strict rules, but as a collection of proven solutions for creating beautiful, functional spaces. Whether you’re drawn to a clean, minimalist look or a warm, organic feel, the right combination of colors, materials, and textures can completely redefine a compact room. At Freddie Ramon, we guide our clients through this process, helping them select high-end finishes and custom details that reflect their vision while making the most of every square foot.

Common Choices for Colors and Materials

Color is one of the most powerful tools for influencing perception in a small space. To make a room feel larger and more open, it’s best to stick to light colors like white, cream, or soft pastels. These shades are excellent at reflecting light, which creates a brighter, more expansive atmosphere. The materials you choose play an equally important role. Consider using glossy tiles on the walls or in the shower; their shiny surface bounces light around the room, making it feel fresh and airy. This is especially effective in bathrooms that don’t get much natural light, as it helps to amplify whatever light source is available.

Embracing Natural and Earthy Textures

Bringing elements of the outdoors inside is a wonderful way to make a small bathroom feel like a serene retreat. Using earth tones like warm browns and calming greens can make the space feel cozy and grounded. But creating an organic feel goes beyond just color. Introducing texture adds depth and interest without cluttering the room. Instead of leaving all the walls plain, you could add textured tiles to a feature wall or apply a subtle, tactile wallpaper like grasscloth. This approach adds a layer of sophistication and keeps the design from feeling flat, turning a simple bathroom into a space with rich character.

Strategic Layouts and Fixtures to Maximize Space

A thoughtful layout is the backbone of any successful small bathroom design. Before you even think about tile or paint, it’s crucial to plan how the space will function. The right arrangement can improve flow, create a sense of openness, and ensure every fixture serves its purpose without making the room feel cramped. It’s a puzzle of maximizing utility while maintaining a clean, uncluttered aesthetic. This is where meticulous planning pays off, turning potential challenges into opportunities for clever, custom solutions that blend practicality with high-end design. Every decision, from the placement of the vanity to the style of the shower, contributes to the final result.

Planning for Your Bathroom’s Shape and Size

Every small bathroom has its own unique footprint, and the best layout is one that works with its specific dimensions. For long, narrow rooms, a “galley-style” layout can be incredibly efficient, with a double vanity lining one wall and the shower and toilet on the other. It’s also important to be realistic about your needs. Take a moment to consider if you truly require a shower-bath combination. If you rarely take baths, a spacious walk-in shower might be a more practical and luxurious choice that also opens up the room visually. Making these key decisions early on ensures the final design is perfectly tailored to your lifestyle.

Select Smart, Space-Saving Fixtures

Your choice of fixtures can dramatically impact how large your bathroom feels. One of the most effective strategies is to use wall-mounted furniture whenever possible. A “floating” vanity, for example, is mounted directly to the wall and doesn’t touch the ground. This simple change clears up floor space, which tricks the eye into seeing the room as bigger and more open. This approach not only enhances the sense of space but also makes the room easier to clean. By selecting smart, streamlined fixtures, you can maintain full functionality while creating a light, airy atmosphere.

Design an Open and Airy Shower Area

The shower area often dominates a small bathroom, so its design is critical for maintaining an open feel. Opaque shower curtains or bulky framed doors can visually shrink the space by cutting it in half. Instead, opt for clear glass to preserve sightlines and let light flow freely throughout the room. You could install a seamless glass wall or a half-wall with a glass panel on top. These options effectively contain water while keeping the bathroom feeling bright and unified. This creates a more modern and sophisticated look that feels far more spacious than a traditional enclosed shower.

Maximize Counter Space with the Right Vanity

In a small bathroom, every surface counts, especially the vanity countertop. While pedestal sinks have a certain charm, they offer zero storage or counter space. If you need a place for your daily essentials, it’s much more practical to choose a vanity with built-in storage. For an even greater sense of space, a floating vanity is an excellent choice. Because it doesn’t extend to the floor, you can see more of the flooring underneath, which helps the room appear larger. This fixture gives you the best of both worlds: essential storage and an open, uncluttered look.

What Paint Colors Make a Small Bathroom Look Bigger?

Choosing the right wall color is one of the most effective ways to transform a small bathroom. Paint is a powerful tool that can trick the eye, creating an illusion of depth and openness where space is limited. While it might seem like your options are restricted, the right color strategy can make your compact bathroom feel airy, bright, and anything but small. It’s all about understanding how different hues, finishes, and applications interact with light to either expand or enclose a room. By making a few strategic choices, you can turn a cramped powder room into a sophisticated and spacious-feeling retreat.

Go for Light and Airy Neutrals

It’s a classic design rule for a reason: light colors make a room feel bigger. Hues like soft white, cream, light gray, and pale pastels are fantastic at reflecting light, which instantly brightens a space and makes it feel more open and expansive. In a bathroom with limited or no natural light, this effect is even more crucial. Sticking to a light color scheme creates a seamless, airy atmosphere that prevents the walls from feeling like they’re closing in. This approach doesn’t have to be boring; you can explore a whole spectrum of neutral shades to find the perfect tone that adds warmth and sophistication to your personal oasis.

Does Paint Finish Matter? Glossy vs. Matte

Beyond the color itself, the paint’s finish plays a huge role in how spacious your bathroom feels. A semi-gloss or high-gloss finish is an excellent choice for a small bathroom because it reflects light beautifully. This sheen bounces light around the room, mimicking the effect of a mirror and creating a subtle sense of depth. As a bonus, these finishes are highly durable and moisture-resistant, making them a practical choice for a humid environment. While a matte finish can offer a soft, modern look, it absorbs light and can make a small space feel a bit flat. For maximum impact, pair a light, neutral color with a glossy paint finish to make your walls recede.

Create Subtle Interest by Mixing Finishes

While a light color palette sets the stage, the real character of your bathroom emerges when you layer different finishes and textures. This is the secret to creating depth without adding visual clutter. Think about pairing sleek, glossy tiles in the shower with a velvety matte finish on the walls. The contrast is subtle but sophisticated, playing with light to keep the room from feeling one-dimensional. You can also introduce a tactile element with a feature wall of dimensional tile or even a durable, moisture-resistant wallpaper. These thoughtful details make a space feel curated and inviting. At Freddie Ramon, we find that these nuanced combinations are what turn a simple bathroom into a personal, luxurious retreat.

Add Drama with a Single Accent Wall

If an all-neutral bathroom isn’t your style, don’t worry—you can still use color to your advantage. Creating a dramatic accent wall with a dark, moody paint color or a bold, patterned wallpaper can add incredible depth and personality. By drawing the eye to a single, striking feature, you create a focal point that makes the room feel more dynamic and intentionally designed. Consider painting the wall behind your vanity a deep navy or charcoal, or apply a sophisticated wallpaper with a vertical pattern to make the ceiling feel higher. This technique adds a touch of luxury and character, proving that even the smallest rooms can make a powerful design statement.

What Are the Best Materials for Small Bathroom Walls?

Choosing the right wall material is about more than just aesthetics; it’s a strategic design decision that can make your compact bathroom feel open, airy, and luxurious. The goal is to select finishes that trick the eye, creating an illusion of space while reflecting your personal style. Forget the old rule that small rooms require simple, plain walls. With the right materials, you can introduce texture, pattern, and character without making the room feel cramped. From large-format tiles that create a seamless canvas to elegant wallpapers and classic paneling, the options are surprisingly versatile. Let’s explore a few of our favorite approaches for transforming a small bathroom into a sophisticated retreat. Each material offers a unique way to manipulate the perception of space, proving that even the most compact rooms can make a grand statement. By thinking carefully about what covers your walls, you can craft a space that feels intentional, cohesive, and anything but small.

Why Bigger Tiles Are Better for Small Spaces

It might seem counterintuitive, but large-format tiles are a small bathroom’s best friend. Using oversized tiles in materials like marble, porcelain, or ceramic minimizes the number of grout lines, which are visual interruptions that can make a space feel busy and confined. With fewer lines breaking up the wall, you get a clean, continuous surface that helps the room feel more expansive. This approach is perfect for creating a serene, spa-like atmosphere. Opting for light-colored tiles will further enhance the aesthetic appeal by reflecting more light, but a dramatic, large-scale dark tile can also create a sense of depth and luxury when balanced with proper lighting.

Match Grout to Tile for a Seamless Look

Once you’ve selected your beautiful large-format tiles, the next detail to consider is the grout. This might seem like a minor point, but it has a major impact on the final look. To maintain that clean, expansive feel, choose a grout color that closely matches your tile. Using grout that’s the same color as your tiles makes the surface look smooth and continuous, which helps a small space feel calmer and bigger. This technique erases the grid-like pattern that contrasting grout creates, allowing the eye to sweep across the wall without interruption. The result is a sophisticated, monolithic look that enhances the sense of space and contributes to a serene, uncluttered atmosphere. It’s a subtle but powerful decision that supports a cohesive design.

Use Smaller Tiles to Add Grip and Personality to Floors

While large tiles are ideal for walls, the floor is a perfect place to play with smaller tiles and introduce some character. Small bathrooms are perfect for fun floor tiles like penny rounds, hexagons, or bold patterns. These smaller shapes add a touch of personality and visual interest without overwhelming the room. Think of the floor as a canvas for a unique design moment. Beyond the aesthetic appeal, there’s a key functional benefit: smaller floor tiles can also provide better grip, making them safer. The increased number of grout lines creates more texture underfoot, which is a practical advantage in a wet environment. This approach allows you to infuse your space with a custom feel while also making a smart, safety-conscious choice.

Yes, You Can Use Wallpaper (If It’s Moisture-Resistant)

Wallpaper in a bathroom? Absolutely. Thanks to modern innovations, you can find stunning moisture-resistant wallpapers designed specifically for humid environments. This is your chance to inject bold personality and visual interest into the space without sacrificing an inch of floor area. A well-chosen pattern can add texture and personality, turning a plain wall into a captivating feature. For a small bathroom, consider designs with a larger scale or a subtle, repeating pattern that won’t overwhelm the room. A botanical print, a sophisticated geometric design, or a textured grasscloth can all add a layer of custom-designed elegance that paint alone simply can’t match.

Add Depth with Textured Wallpaper

Going a step further than a simple pattern, textured wallpaper introduces a tactile quality that adds another layer of sophistication to your bathroom walls. Think about materials like vinyl grasscloth, which offers the organic feel of natural fibers but with the durability needed for a humid space. The subtle texture plays with light, creating soft shadows and highlights that give the walls a sense of depth and movement. This is a fantastic way to achieve a custom, high-end feel, turning a simple powder room into a space with rich character. Exploring options like embossed geometric designs or fabric-inspired vinyls can provide that layer of bespoke elegance that makes a small room feel truly special and thoughtfully designed.

Use Vertical Paneling to Add Height

To make a small bathroom feel taller, draw the eye upward. Vertical paneling, such as classic beadboard or modern shiplap, is an excellent way to do this. The strong vertical lines create the illusion of higher ceilings, making the entire room feel more spacious and open. This technique also adds a layer of architectural character and timeless charm that works beautifully in both traditional and contemporary designs. You can install paneling on all walls or use it as an accent on a single wall. Painted in a crisp white or a soft, light hue, it provides a clean backdrop that feels both custom and thoughtfully designed.

How Can I Get More Storage from My Bathroom Walls?

When floor space is at a premium, the only way to go is up. Maximizing your wall storage is the secret to a small bathroom that feels both functional and serene. The goal isn’t just to add storage, but to integrate it so seamlessly that it becomes part of the design itself. By turning your walls into hard-working (and beautiful) assets, you can keep countertops clear and essentials neatly tucked away, creating an open, uncluttered atmosphere.

Forget bulky, floor-standing units that visually shrink the room. Instead, we’ll focus on clever, space-saving solutions that draw the eye upward and maintain a sense of airiness. From sleek floating shelves that display your favorite decor to hidden cabinets that conceal everyday items, the right wall storage can completely transform your bathroom. It’s all about choosing pieces that reflect your style while serving a distinct purpose, ensuring every inch of your space is used thoughtfully. Let’s explore a few ways to achieve this with elegance and precision.

Add Floating Shelves and Smart Niches

Floating shelves are a designer’s best friend in a compact bathroom. They offer a light, airy alternative to heavy cabinetry and provide the perfect spot for curated displays. You can add floating shelves above the toilet or sink to keep toiletries organized without occupying floor space. Consider materials like thick-cut glass, warm reclaimed wood, or a slab of marble to match your countertops for a truly custom look. For an even more integrated solution, built-in niches are the epitome of luxury. Carved directly into the wall, often in the shower or above the bathtub, they provide a sleek, waterproof home for shampoos and soaps, eliminating the need for clumsy caddies.

Get Cabinets Off the Floor with Wall Mounts

One of the best ways to create the illusion of a larger bathroom is to lift everything off the floor. A wall-mounted vanity or cabinet instantly makes the room feel more open by exposing the flooring underneath. For an even more streamlined approach, use recessed medicine cabinets with mirrors for hidden, space-saving storage. These are set into the wall, so they don’t protrude into your space, keeping the lines of the room clean and uninterrupted. A custom-designed mirrored cabinet can be tailored to your exact needs, offering a sophisticated way to keep essentials out of sight while providing a much-needed reflective surface.

Make the Most of Vertical Space with Hooks and Bars

Don’t overlook the power of vertical space. Every inch of your wall is an opportunity for stylish storage. You can install wall-mounted hooks, baskets, or towel bars to maximize vertical wall space and keep linens off the floor. Instead of a standard towel bar, consider a wall-mounted heated rack for a touch of spa-like luxury or a sleek towel ladder that adds architectural interest. A set of sculptural hooks can double as wall art while providing a place to hang robes and towels. These small but mighty additions are simple ways to organize your bathroom and infuse it with personality.

Try a Decorative Ladder for Towel Storage

If a standard towel bar feels a bit uninspired, consider a decorative ladder. This is one of my favorite ways to introduce both function and form into a small bathroom. A sleek ladder, whether crafted from warm bamboo or modern black metal, leans against the wall to provide ample hanging space for multiple towels. It draws the eye upward, making the room feel taller, and its open design prevents it from feeling heavy or bulky. More than just a place to hang linens, a ladder acts as a sculptural piece, adding a layer of architectural interest that feels both casual and incredibly chic. It’s a perfect example of how a simple, thoughtful choice can transform everyday storage into a genuine design moment.

Can Mirrors Really Make a Bathroom Look Bigger?

Mirrors are one of the most effective tools for small spaces. They do more than just show your reflection; they manipulate light and perception to create a sense of depth and openness. In a compact bathroom, a well-placed mirror can visually double the size of the room, making it feel brighter, airier, and far more luxurious. It’s a classic trick for a reason—it works beautifully. By thinking beyond the standard vanity mirror, you can transform your bathroom walls into features that are both functional and expansive.

Try a Dramatic Floor-to-Ceiling Mirror

For a truly dramatic effect, go big. A floor-to-ceiling mirror instantly adds a sense of grandeur and height to a small bathroom. Consider installing large, mirrored panels on a full wall or even on the back of the door to create the illusion of extra room. This approach not only makes the space feel significantly larger but also adds a sleek, modern touch that feels incredibly high-end. It’s a bold move that turns a simple wall into a stunning focal point, reflecting your entire design and making every detail count twice.

Hang Mirrors Where They’ll Catch the Light

The placement of your mirror is just as important as its size. To maximize its space-enhancing effects, think about what it will reflect. Hanging a long mirror directly across from a window is a brilliant strategy. This allows the mirror to capture and bounce natural light around the room, making the entire space feel brighter and more open. The reflection of the outdoors also brings a touch of nature inside, creating a more serene and expansive atmosphere. This simple adjustment can completely change the feel of your bathroom without any major renovations.

Get Double Duty from a Mirrored Cabinet

In a small bathroom, every inch of space counts. Mirrored medicine cabinets are a classic solution that offers the best of both worlds: essential storage and a reflective surface. For a clean, seamless look, opt for recessed cabinets that sit flush with the wall. This provides hidden, space-saving storage for toiletries and essentials, keeping your countertops clear and uncluttered. It’s a practical choice that doesn’t sacrifice style, allowing you to maintain a minimalist aesthetic while still having everything you need within arm’s reach.

How to Use Patterns Without Shrinking Your Space

The idea of using patterns in a small bathroom can feel intimidating, but the right choice can add personality without making the room feel cramped. The secret is to select designs that enhance, rather than dominate, the space. By focusing on scale, texture, and strategic placement, you can introduce a sophisticated layer of detail that complements the room’s compact footprint and feels both intentional and expansive.

Think Vertical Stripes to Fake a High Ceiling

One of the most effective design tricks for a small bathroom is to draw the eye upward. Vertical patterns are brilliant for this, creating an illusion of higher ceilings and a more open atmosphere. Think beyond simple striped wallpaper—though a classic option is always in style. You can achieve this effect with vertically installed shiplap for a touch of warmth or by laying tile in a vertical stack. Even a subtle paint technique with vertical stripes can make the space feel taller. This approach adds character while cleverly manipulating the room’s perceived proportions.

Stick to Subtle Textures and Simple Geometrics

If bold patterns aren’t your style, you can still create a dynamic look with texture. Introducing materials with tactile qualities, like ribbed tiles, fluted wood paneling, or a high-quality, moisture-resistant wallpaper, adds a layer of sophistication. These elements catch the light in unique ways, creating subtle shadows and highlights that give the walls depth. When considering prints, opt for subtle geometric designs in a low-contrast palette. A tone-on-tone pattern provides visual interest without overwhelming the eye, keeping the overall feeling serene and uncluttered.

Break Up Walls with Wainscoting

For a timeless and structured look, consider breaking up your walls with wainscoting or a half-wall tile treatment. This classic design choice grounds the lower portion of the room while allowing the upper half to feel light and open. Tiling halfway up the wall is not only practical—serving as a durable backsplash—but also adds a beautiful decorative element. You can paint the wall above the treatment a lighter color to maximize the sense of height. This approach introduces color and texture in a measured way, creating a polished, custom look that feels anything but small.

How Do You Choose Wall Treatments for Wet Areas?

When designing a small bathroom, the walls in your shower and around the sink—what we call “wet areas”—need special attention. These zones are constantly exposed to water, steam, and humidity, so your material choices are about more than just looks; they’re about long-term durability and preventing issues like water damage or mildew. The key is to find a balance between robust performance and the sophisticated aesthetic you want for your space.

Choosing the right wall treatment means thinking about how it will stand up to daily use while contributing to the overall design. You want materials that are completely waterproof, easy to clean, and seamlessly integrated into your bathroom’s style. From classic large-format tiles that create an expansive feel to modern, seamless panels that offer a minimalist look, the options are plentiful. By focusing on materials designed for high-moisture environments and planning for proper ventilation, you can create a beautiful, functional bathroom that remains pristine for years.

Choose 100% Waterproof Materials for the Shower

In the areas with the highest water exposure, like your shower enclosure and the wall behind your vanity, non-negotiable waterproofing is the top priority. This is where you’ll want to invest in materials that create an impenetrable barrier against moisture. Porcelain and ceramic tiles are classic choices for a reason; they are incredibly dense, non-porous, and come in endless styles. For a truly luxurious and seamless look, consider large slabs of quartz or natural stone like marble, which minimize grout lines and create a stunning, continuous surface.

Modern alternatives also offer incredible performance and style. High-quality bathroom wall panels made from solid surfaces or composite materials provide a completely grout-free solution, making them exceptionally easy to clean and maintain. These panels can mimic the look of natural stone or offer a clean, solid color, giving you a sleek and contemporary finish that protects your walls completely.

Consider Durable Ceramic or PVC Panels

Beyond being waterproof, your wall treatments need to be durable enough to handle the daily wear and tear of a busy bathroom. Ceramic and porcelain tiles are champions of durability, resisting scratches, stains, and fading over time. Their versatility allows for creative expression, whether you prefer the clean lines of a subway tile or the intricate patterns of a mosaic. These materials are built to last, ensuring your bathroom walls look just as beautiful in ten years as they do today.

For a modern and practical approach, consider high-end PVC panels. These aren’t the basic panels of the past; today’s options are engineered to be completely waterproof and resistant to mold and mildew. They come in a stunning array of finishes that convincingly replicate the look of materials like marble, slate, or even textured wood. This makes them a fantastic choice for achieving a high-end aesthetic without the maintenance demands of natural materials, giving you both beauty and peace of mind.

Don’t Forget About Ventilation and Upkeep

Even the most waterproof materials need a helping hand to stay in top condition. Proper ventilation is crucial in any bathroom, but it’s especially important in a compact space where moisture can become trapped. A high-quality, properly sized exhaust fan is your best defense against humidity, helping to prevent the growth of mold and mildew and protecting your wall finishes, fixtures, and cabinetry. Running the fan during and for at least 20 minutes after every shower makes a significant difference.

Integrating natural light and airflow can also contribute to a healthier bathroom environment. If your layout allows, a small window or a skylight can introduce sunlight and fresh air, which naturally helps keep the space dry. When planning your design, think about how you can incorporate ventilation strategically. Paired with a simple cleaning routine tailored to your chosen materials, a well-ventilated bathroom will ensure your beautiful wall treatments remain flawless.

How Can Lighting Brighten Up Your Bathroom Walls?

The right lighting is one of the most powerful tools in interior design, especially in a small bathroom. It’s about so much more than just being able to see; a well-thought-out lighting plan can completely transform the feel of your space. Strategic lighting makes a compact room feel more open and airy, highlights the texture of your wall materials, and creates a serene, spa-like atmosphere. Forget the single, harsh overhead fixture. A truly luxurious bathroom uses multiple light sources to build a functional and inviting environment.

By combining different types of fixtures, you can eliminate dark corners and unflattering shadows, making the entire room feel brighter and more expansive. Think of light as another layer of your design. It interacts with your chosen wall colors, making light hues feel more radiant and adding depth to darker tones. A great lighting scheme considers how you use the space throughout the day, providing bright, clear light for your morning routine and a soft, relaxing glow for unwinding in the evening. It’s this attention to detail that turns a purely functional room into a personal sanctuary.

Free Up Counter Space with Wall Sconces

Wall-mounted sconces are a classic and elegant solution for small bathrooms. By mounting lights directly to the wall, you free up precious counter space around the sink, creating a cleaner, more organized look. For the most flattering light, place a sconce on each side of your mirror at roughly eye level. This placement provides even, cross-illumination that’s perfect for makeup application and grooming, eliminating the harsh shadows that a single overhead light can cast. Sconces also act as beautiful decorative elements, adding a touch of personality and sophistication that enhances your overall design aesthetic, much like a piece of fine jewelry.

Ensure Proper Placement for Flattering Light

The placement of your lighting is just as critical as the fixtures themselves. For the most flattering effect, sconces should be mounted on either side of the mirror at eye level—usually around 60 to 65 inches from the floor. This positioning provides even, cross-illumination that washes across your face, eliminating the harsh, unflattering shadows cast by a single overhead light. It’s this kind of thoughtful detail that makes daily routines like applying makeup or shaving feel effortless. A truly well-designed lighting scheme layers multiple sources to create a bright, welcoming atmosphere, turning a functional necessity into a moment of everyday luxury.

Add Integrated Lighting to Mirrors and Shelves

For a seamless and modern look, consider integrating lighting directly into your bathroom’s features. Backlit mirrors are a fantastic option, providing a soft, ambient glow that appears to float off the wall. This technique saves space while adding a layer of sophisticated, indirect light. Many modern designs even allow you to install lights directly onto mirrors to direct light exactly where you need it. You can also add concealed LED strips to the underside of floating shelves or inside built-in shower niches. This not only highlights your beautiful tile work and decor but also adds a sense of depth, making the walls feel further away.

Layer Different Light Sources for a Better Vibe

The key to a perfectly lit bathroom is layering. A successful design incorporates a combination of different light types that work together to serve different purposes. Start with ambient lighting from overhead sources like recessed lights or a central flush mount to illuminate the entire room. Next, add task lighting around the vanity with wall sconces or a backlit mirror for clear, direct light. Finally, consider accent lighting, like the integrated shelf lighting mentioned earlier, to highlight architectural details. Installing dimmers on each layer gives you complete control, allowing you to adjust the intensity to suit your mood and needs.

Final Touches: Decor Details That Expand Your Space

Once the foundational elements like tile, paint, and lighting are in place, the final layer of decor is what truly brings a small bathroom to life. These finishing touches are far from afterthoughts; they are strategic details that reinforce the illusion of space while infusing the room with personality and a sense of custom luxury. Every choice, from the textiles you select to the way you hang your shower curtain, contributes to the overall feeling of the room. This is where meticulous craftsmanship shines, turning a functional space into a thoughtfully curated retreat.

The goal is to select accessories that are both beautiful and purposeful, enhancing the design without adding clutter. By focusing on elements that draw the eye upward, reflect light, and add texture, you can make your compact bathroom feel grand and intentional. These small adjustments have a significant impact, proving that a sophisticated design is built on a series of deliberate, well-executed choices. Let’s look at a few simple swaps and styling tricks that will complete your space with elegance and flair.

Hang Shower Curtains High to Add Height

One of the most effective ways to make a small bathroom feel taller is to adjust the height of your shower curtain. Instead of using a standard-length curtain and placing the rod just above the shower opening, mount it as close to the ceiling as possible. This simple change requires an extra-long shower curtain, but the effect is dramatic. The long, uninterrupted line of fabric draws the eye upward, creating a powerful illusion of a higher ceiling and a more spacious room. It’s a technique interior designers use to add verticality, much like hanging drapery high and wide around a window. For maximum impact, choose a curtain in a light, solid color that blends with your wall color or one with a subtle vertical pattern to further emphasize the height.

Swap Your Bath Mat for a Stylish Rug

A standard, rubber-backed bath mat can feel purely utilitarian and often visually shortens a room by breaking up the floor. To create a more cohesive and luxurious feel, replace it with a stylish rug. Treating your bathroom floor with the same consideration as any other room in your home instantly makes the space feel more intentional and designed. A small vintage runner or a beautiful flat-weave rug can introduce color, pattern, and texture, adding warmth and character underfoot. This simple swap helps the bathroom feel like a seamless extension of your home’s overall aesthetic, rather than a separate, functional zone. Just be sure to choose a durable material that can handle light moisture and add a non-slip pad underneath for safety.

Looking for an Easy Weekend Wall Project?

You don’t need a complete overhaul to breathe new life into a small bathroom. Sometimes, the most impactful transformations come from simple, focused updates that you can accomplish in a weekend. By concentrating on the walls, you can dramatically alter the room’s mood and perceived size without the commitment of a full renovation. A fresh coat of paint, stylish removable wallpaper, or clever storage can deliver that custom, high-end feel you’re looking for. These projects are perfect for adding a personal touch and making your space feel more intentional and thoughtfully designed.

Get Creative with Paint and Color Blocking

Paint is one of the most effective tools for transforming a space. For a modern, expansive feel, try a monochromatic scheme where the walls, trim, and even the ceiling are painted the same color. This technique blurs the lines of the room, making it feel larger and more cohesive. Using light and neutral hues like soft white, beige, or pale grey with a semi-gloss finish will reflect light beautifully and open up the space. If you’re feeling more adventurous, especially in a powder room, create a dramatic accent wall. A deep, moody paint color or a bold, geometric pattern can add incredible personality and a touch of luxury without overwhelming the small footprint.

Try Removable Wallpaper or Peel-and-Stick Tiles

If you want to add pattern and texture without a long-term commitment, removable wall treatments are a brilliant solution. High-quality, moisture-resistant wallpaper can introduce a sophisticated print or subtle texture, giving your bathroom a custom-designed look. It’s an ideal way to experiment with bold designs that you might otherwise hesitate to use. Similarly, peel-and-stick tiles offer the classic appeal of a tiled backsplash or feature wall without the need for grout or a contractor. For a completely seamless and modern aesthetic, you might also explore waterproof wall panels, which are durable, easy to clean, and provide a sleek alternative to traditional tile.

Update Old Tile Without Replacing It

If your bathroom tile feels a bit dated but a full-scale renovation isn’t in the cards, don’t worry. You have several elegant options for a modern refresh. A specialized tile paint can work wonders, covering busy patterns with a clean, uniform color for a sophisticated, updated look. For a more dramatic change, high-end peel-and-stick tiles can be applied directly over your existing surface, offering a chance to introduce a chic pattern without the mess of demolition. And never underestimate the impact of grout—a thorough cleaning or a new color applied with a grout pen can make the entire wall feel crisp and new. These simple methods are perfect for achieving a high-impact, custom feel over a single weekend, letting you update your tile without a major commitment.

DIY Some Simple Custom Shelving

Clutter is the enemy of a small space, and getting items off the floor and countertops is essential. Maximizing your vertical space with smart, custom storage is both practical and chic. Install a few floating shelves above the toilet to hold decorative objects and neatly folded towels. This keeps necessities within reach while adding a stylish, airy element to the room. You can also build shallow, recessed shelves between wall studs to create built-in niches for toiletries—a hallmark of custom design. By thinking vertically, you can add significant storage that enhances your bathroom’s design instead of detracting from it, keeping the space organized and serene.

Frequently Asked Questions

Can I really use a dark color in my small bathroom? Absolutely. While it’s true that light colors are a safe bet for creating an airy feel, a dark, moody color can add incredible depth and sophistication when used correctly. The key is to be strategic. Instead of painting the entire room a deep navy or charcoal, use it on a single accent wall, like the one behind your vanity. This creates a dramatic focal point that draws the eye and makes the room feel more dynamic and intentionally designed, rather than just small.

Will large tiles actually make my small bathroom look bigger? It might seem counterintuitive, but yes, they work wonders. The magic is in the reduction of grout lines. Grout lines create a grid-like pattern that can visually chop up a surface, making it feel busy and confined. By using large-format tiles, you minimize those lines, creating a cleaner, more seamless look. This continuous surface tricks the eye into seeing the space as more expansive and serene.

My bathroom has no windows. What are the best ways to make it feel brighter? A windowless bathroom is a common challenge, but you can absolutely create the feeling of light and space. Start by painting the walls a light, neutral color in a semi-gloss or satin finish to reflect as much light as possible. Then, focus on your lighting plan. Layering your light with wall sconces beside the mirror and recessed lights overhead will eliminate shadows. Finally, a large, well-placed mirror is essential, as it will bounce all that artificial light around the room, making it feel significantly brighter and more open.

I love the idea of wallpaper, but is it truly safe to use in a humid bathroom? It is, as long as you choose the right product. Modern wallpapers have come a long way, and many are now specifically designed to be moisture-resistant and durable enough for bathroom environments. Look for options labeled as “splash-proof” or suitable for kitchens and baths. To be extra safe, ensure your bathroom has a high-quality exhaust fan to manage humidity, and consider using wallpaper on a wall that doesn’t get direct water exposure, like the one behind the toilet or vanity.

Besides choosing the wrong color, what’s a common mistake to avoid with small bathroom walls? A frequent mistake is cluttering the walls with too many small, disconnected elements. A tiny piece of art, a small shelf, and a single towel hook can make a wall feel busy and disorganized. Instead, think bigger and more cohesively. Opt for one large piece of art instead of several small ones, or install a sleek set of floating shelves to create a single, unified storage moment. A clean, intentional approach will always make a small space feel more polished and serene.

Make Affordable Upgrades with Big Impact

You don’t need to tear down walls to make your small bathroom feel more luxurious and spacious. Some of the most effective transformations come from small, strategic upgrades that pack a major design punch. By focusing on key details like hardware and lighting, you can create a high-end, custom feel without the time and expense of a full renovation. These thoughtful changes can completely shift the atmosphere of the room, turning a purely functional space into a polished retreat. It’s all about identifying the elements that offer the most impact for your effort.

Change Out Hardware and Fixtures

Swapping out builder-grade hardware is one of the quickest ways to add a touch of custom sophistication. Think about replacing cabinet pulls, drawer handles, and your faucet with pieces that have more character and a higher-quality finish. For a more significant change, consider fixtures that help create an illusion of space. A wall-mounted vanity is a fantastic choice because it lifts the cabinetry off the floor, exposing more of the flooring and making the room feel instantly larger and more open. Similarly, you can install wall sconces on either side of your mirror to free up valuable counter space and cast a more flattering, even light.

Install Budget-Friendly Accent Lighting

Lighting is everything in a small space, and moving beyond a single, harsh overhead fixture can completely change the room’s vibe. The key is to layer your lighting. A great design combines multiple light sources to handle different needs, from bright task lighting for your morning routine to soft ambient light for a relaxing evening. Consider integrating lighting directly into your bathroom’s features for a clean, modern look. A backlit mirror provides a beautiful, soft glow that makes the mirror seem to float off the wall. These thoughtful additions eliminate dark corners and create a warm, inviting atmosphere that feels both intentional and luxurious.

Related Articles

Simple pantry design with organized shelves and clear containers.

A Simple Pantry Design for an Organized, Luxe Kitchen

A simple pantry design focuses on functionality, accessibility, and efficient use of space. Clear zoning for dry goods and essentials helps streamline daily routines. Adjustable shelving, labeled containers, and proper lighting improve usability even in small spaces, making the pantry both practical and visually organized.

Key Takeaways

  • Prioritize a thoughtful layout for effortless use: Combine smart features like adjustable shelving, pull-out drawers, and layered lighting to ensure every item is visible and easy to reach, transforming your pantry from a simple closet into a functional workspace.
  • Integrate style with durable materials: Choose high-quality, easy-to-clean surfaces and a cohesive color palette that extends from your kitchen. This approach creates a pantry that is not only beautiful but also resilient enough for the demands of daily life.
  • Establish a clear organizational system: Use dedicated zones for different food categories, decant goods into uniform containers, and label everything. This creates an intuitive order that simplifies meal prep and is easy to sustain with simple, regular maintenance.

What Makes a Pantry Design Work?

A truly exceptional pantry is more than just a closet for food; it’s a seamless extension of your kitchen, designed to make your daily life simpler and more elegant. When thoughtfully planned, a pantry brings a sense of calm and order to your home, turning meal prep from a frantic search into a graceful process. It’s where functionality meets personal style, creating a space that not only stores your essentials but also supports your lifestyle.

The secret to achieving this lies in three core elements: smart shelving, proper lighting, and effortless flow. These components work together to create a space that is intuitive, accessible, and beautiful. By focusing on how you’ll actually use the space, we can design a pantry that feels custom-built for you. It’s about creating a system where every item has a logical home, is easy to see, and is simple to retrieve. This thoughtful approach transforms a basic storage area into a cornerstone of an organized and efficient home.

Consider the Pantry’s Location

Where you place your pantry is just as important as what you put inside it. The ideal location supports the natural rhythm of your household activities. Think about the journey your groceries take from the car to the shelf. A pantry situated near the kitchen and a secondary entrance, like a garage or back door, makes unloading groceries a simple, one-trip task. This strategic placement not only enhances functionality but also helps maintain the aesthetic of your main living spaces. By keeping the pantry tucked away from the direct sightline of the living or dining room, any temporary clutter remains your little secret, ensuring your home always feels serene and put-together.

Plan for Common Layouts

The shape of your pantry will guide its layout, but the goal is always the same: make everything easy to see and reach. For a walk-in space, a U-shaped or L-shaped design with open shelving is incredibly efficient. You can organize zones for different categories—baking supplies on one wall, canned goods on another, and snacks at an accessible height for everyone in the family. The key is to combine smart features like adjustable shelving for tall items, pull-out drawers for bags of grains, and layered lighting to illuminate every corner. This approach transforms your pantry from a simple storage closet into a functional workspace that supports your daily cooking and meal planning.

Incorporate Custom Cabinetry

Off-the-shelf solutions can work, but custom cabinetry is what truly tailors a pantry to your home and your needs. Many homes, especially in Las Vegas, have unique architectural features or oddly shaped spaces that standard units just can’t accommodate. Custom cabinets are designed to fit the room’s exact dimensions, making the most of every inch from floor to ceiling. This is where you can get creative with specialized storage, like vertical dividers for baking sheets, built-in wine racks, or drawers perfectly sized for your spice collection. It’s a client-centered approach that ensures the final design is a true reflection of your lifestyle, blending seamlessly with your kitchen’s aesthetic.

Get Smart with Your Shelving

The right shelving can make or break your pantry’s functionality. Instead of deep, fixed shelves where items get lost in the back, consider a more dynamic approach. Adjustable shelves give you the flexibility to change your layout as your needs evolve, while pull-out drawers and baskets bring everything into view with a simple tug. Before settling on a design, we always measure your largest or most-used items—like a stand mixer or bulk containers—to ensure a perfect fit. For smaller pantries, shallow drawers can be a game-changer, offering easy access without requiring you to dig through layers of items.

Brighten Up Your Space

A dimly lit pantry is a frustrating one. Great lighting is essential for both function and ambiance, ensuring you can quickly find what you need while making the space feel clean and inviting. A layered lighting strategy works best. Start with a stylish overhead fixture for general illumination. Then, add LED strip lights under the shelves to brighten up dark corners and highlight your items. For an added touch of convenience, motion-sensor lights inside cabinets or along walkways mean you’ll never have to fumble for a switch with your hands full. Good lighting makes all the difference in transforming a pantry from a dark closet into a bright, functional space.

Design for Effortless Access

A well-designed pantry should feel intuitive. The goal is to create a natural flow that simplifies everything from putting away groceries to planning your next meal. When you can see everything you have at a glance, meal planning becomes much easier, and you’re less likely to buy duplicates. We organize the space with ergonomics in mind: heavy items like bags of flour or bulk oils belong on lower shelves to prevent straining, while everyday snacks and essentials are best placed at eye level for easy grabbing. This thoughtful placement ensures your pantry is not only organized but also a genuine pleasure to use.

How to Maximize Space in a Small Pantry

A small pantry doesn’t have to mean a cluttered kitchen. With a thoughtful approach, you can transform even the most compact space into a highly functional and beautifully organized extension of your home. It’s all about using clever design strategies to make every inch count. These simple adjustments can completely change how you interact with your pantry, turning a point of frustration into a source of daily satisfaction. Let’s look at a few key ways to get the most out of your pantry, no matter its size.

Use Your Vertical Space

When you can’t build out, build up. Utilizing the full vertical height of your pantry is the first step to maximizing its potential. Think about installing floor-to-ceiling shelving to draw the eye upward and create ample storage for less-frequently used items on top shelves. You can also use stacking bins to group smaller items like snacks or baking supplies, which keeps them contained and easy to grab. This approach not only adds significant storage capacity but also creates a clean, uncluttered look. Exploring different pantry ideas can show you how custom shelving and pull-out drawers can make the most of your pantry’s height.

Make Your Door Work for You

The back of your pantry door is one of the most underutilized pieces of real estate in the kitchen. Instead of letting it go to waste, turn it into a powerhouse of organization. A simple over-the-door rack can create instant storage for spices, jars, oils, and other slim items that tend to get lost on deep shelves. This keeps your most-used ingredients visible and within easy reach. It’s a perfect example of how a small change can make a big impact, freeing up valuable shelf space for bulkier items and contributing to a more streamlined system.

Add Hooks and Chalkboards

Sometimes the smallest additions make the biggest difference. A few well-placed hooks can instantly streamline your pantry, giving you a dedicated spot for aprons, reusable shopping bags, or even a small broom. It’s a simple way to keep frequently used items off your counters and within easy reach. By selecting hooks that complement your kitchen’s hardware—think elegant brass or modern matte black—this practical feature also becomes a subtle design element, adding to the cohesive feel of your space.

A chalkboard or whiteboard adds another layer of organization and a touch of personal charm. It’s the perfect spot to jot down a running grocery list or plan out the week’s meals, which helps reduce mental clutter. You can frame it to match your cabinetry for a polished look or even use chalkboard paint on a small section of the wall for a more integrated feel. As you can see in many inspiring pantry designs, these functional details are what make a space truly work for your family’s daily rhythm.

Add Pull-Out Shelves for Easy Access

If you’re tired of digging through a deep pantry to find what you need, pull-out shelves are a true game-changer. These shelves slide out like drawers, bringing everything from the back of the pantry right to your fingertips. This means no more forgotten cans or expired goods hiding in the dark corners. Installing them makes your entire inventory accessible and easy to see at a glance, which simplifies meal prep and grocery shopping. Many custom kitchen pantry ideas feature these shelves because they blend seamless functionality with a clean, high-end look, transforming how you use the space.

See Everything with Clear Containers

Decanting dry goods like pasta, grains, and cereal into clear, airtight containers is both practical and aesthetically pleasing. Using uniform containers creates a cohesive, organized look that instantly calms the visual clutter of mismatched packaging. More importantly, it allows you to see exactly what you have and how much is left, which helps prevent overbuying and reduces food waste. This simple swap makes it easier to find what you need quickly and keeps your food fresher for longer. It’s one of the most effective small pantry organization ideas for creating a pantry that feels as good as it looks.

Consider Alternative Storage Furniture

If your kitchen doesn’t have a built-in pantry, don’t see it as a limitation—see it as a design opportunity. Instead of a standard closet, you can introduce a beautiful piece of furniture that adds both character and sophisticated storage. A vintage armoire, a sleek freestanding cabinet, or a glass-front hutch can serve as a stunning and highly functional pantry, allowing you to select a piece that perfectly complements your home’s aesthetic. You can find endless inspiration for integrating a separate storage cabinet into a kitchen design. The true beauty of this approach is the potential for customization; the interior can be outfitted with pull-out drawers and bespoke organizers, blending timeless style with modern convenience.

Simple Pantry Design: Mistakes to Avoid

A well-designed pantry is a joy, but a few common missteps can turn it into a source of frustration. Creating a space that’s both beautiful and functional means thinking through the details from the start. By sidestepping these frequent design mistakes, you can ensure your pantry is a seamless part of your daily routine.

Forgetting to Plan for Airflow

Proper airflow is an essential, yet often overlooked, element of a healthy pantry. A stuffy space traps humidity, which can cause food to spoil and lead to musty odors. To keep things fresh, choose doors with slats or vents that allow air to circulate. For larger walk-in pantries, a small fan or air vent can make a huge difference. Good pantry ventilation is a simple step that protects your food and keeps the space feeling clean and inviting.

Choosing Looks Over Usability

While a beautiful pantry is the goal, don’t let aesthetics compromise practicality. Flimsy shelves, awkward corners, and high-maintenance finishes can cause daily frustration. Before settling on a design, think about what you need to store and how you’ll use the space. Focus on durable materials and a layout that makes sense for your life. An elegant pantry is one that functions as beautifully as it looks, supporting your routine with ease.

Are Your Shelves the Wrong Size?

When it comes to pantry shelves, size is critical. Shelves that are too deep cause items to get lost in the back, while poor vertical spacing creates wasted space. For most goods, a shelf depth of 12 to 16 inches is ideal. I always recommend using adjustable shelving to customize the height for everything from tall cereal boxes to short cans. For lower shelves, pull-out drawers are a game-changer, making every item easy to see and access.

Putting Lights in the Wrong Place

A poorly lit pantry is difficult to use. A single overhead fixture often isn’t enough, leaving corners and lower shelves in shadows. The best approach is layered lighting. Start with a central fixture for general illumination, then add task lighting where you need it most. LED strip lights under shelves are perfect for brightening every level, while motion-sensor lights offer a touch of modern convenience. Good lighting makes finding what you need effortless and transforms the entire feel of the space.

Your Action Plan for an Organized Pantry

A beautifully designed pantry is only as good as its organizational system. The goal is to create a space that feels intuitive and effortless, where everything has a designated home. When your pantry is well-organized, you save time, reduce food waste, and bring a sense of calm to your daily routine. It’s about more than just tidiness; it’s about creating a functional flow that supports your lifestyle. By implementing a few smart strategies, you can transform your pantry from a place of clutter into a streamlined, curated extension of your kitchen. These simple steps will help you build a system that’s easy to use and even easier to maintain, ensuring your pantry remains a source of joy rather than stress.

Plan Your Containers Before You Buy

Before you purchase a single bin or jar, it’s crucial to have a clear plan. The right containers are the foundation of a lasting organizational system, but choosing them without a strategy often leads to a mismatched collection that doesn’t quite fit your space or your needs. This initial planning is where true design intentionality comes into play. Taking the time to assess what you have and how you use it ensures every piece you select serves a specific purpose. This thoughtful approach is what separates a temporarily tidy pantry from one that is effortlessly organized for the long haul, creating a sense of calm every time you open the door.

Start by taking a full inventory. Empty your shelves and group similar items together so you can see exactly what you need to store. Measure the depth, width, and height of your shelves to ensure your new containers will be a perfect fit, avoiding wasted space. Pay special attention to items you buy in bulk and how you’ll access them. Using clear, airtight containers for dry goods like flour and pasta not only keeps them fresh but also creates a clean, uniform look that simplifies your grocery list at a glance. For packaged snacks or cans, open-front bins make it easy to see your inventory and grab what you need without disrupting the entire shelf.

Give Everything a Home with Zones

Think of your pantry like a small, specialized grocery store where you’re the only customer. Creating specific zones is the first step to achieving this level of order. Grouping similar items together—like placing all your baking supplies in one area, breakfast foods in another, and canned goods together—prevents you from buying duplicates and makes meal prep much smoother. You can designate these zones with stylish bins or baskets that complement your home’s aesthetic. For example, use woven baskets for snacks, sleek acrylic bins for pasta and grains, and turntables for oils and vinegars. This approach not only makes items easier to find but also creates a visually cohesive and calming space.

Put Everyday Items Within Reach

Strategic placement is key to a truly functional pantry. It’s all about making the space work for you, not against you. Store heavy items like bulk bags of flour or large appliances on lower, reinforced shelves to avoid heavy lifting. Everyday items and healthy snacks should live at eye level, making them the easiest and most convenient option to grab. Reserve the top shelves for things you use less frequently, like seasonal baking supplies or specialty ingredients. If you have children, consider creating a kid-friendly zone on a low shelf with approved snacks and drinks they can access themselves, fostering a little independence.

Group Similar Items Together

Once you’ve established your broader zones, it’s time to get more specific by grouping like items. Within your baking zone, for instance, keep all the different types of flour together, sugars in another group, and so on. This micro-organization is what takes a pantry from simply tidy to exceptionally functional. Using clear, uniform containers is a fantastic way to implement this system. Decanting items like pasta, rice, and cereal into matching containers not only looks beautiful but also allows you to see exactly what you have at a glance, making it simple to track inventory and keep your pantry looking pristine.

Label Everything (Seriously)

Labeling is the final touch that ties your entire organizational system together. It eliminates guesswork and ensures everyone in the household can find what they need and, just as importantly, put it back in the right place. From simple, elegant vinyl labels to a classic embossed label maker, choose a style that matches your kitchen’s design. Be sure to label your containers with both the contents and the expiration date to keep everything fresh. This small step makes a massive difference in maintaining long-term order and turning your pantry into a perfectly curated and functional space.

What Are the Best Materials for Your Pantry?

The true foundation of a functional and elegant pantry lies in its materials and storage systems. This is where thoughtful design moves beyond simple shelving and transforms a closet into a seamless extension of your kitchen. Choosing the right components ensures your pantry can handle daily life while reflecting the sophisticated aesthetic of your home. It’s about creating a space that feels both hardworking and harmonious, where every surface and solution is selected with your specific needs in mind. This careful selection process is what separates a basic storage closet from a truly integrated and luxurious pantry.

When we partner with clients, we focus on this blend of durability and design. Your pantry should be a place of order and ease, not frustration. That means selecting materials that can withstand spills and constant use, and integrating storage that makes every item accessible. From the finish on the shelves to the hardware on the drawers, these details make a significant difference in your daily routine. By thinking through how you’ll use the space, we can build a custom pantry that not only stores your goods but also simplifies your life. The following elements are key to achieving that perfect balance.

Improve Existing Wire Shelving

Many pantries come standard with wire shelving, which can be a source of daily frustration when items tip over or fall through the gaps. But you don’t have to start from scratch to create a more functional space. A simple fix is to add custom-cut shelf liners to create a solid, stable surface. From there, use bins and baskets to group items and prevent visual clutter. Using uniform containers not only looks clean and intentional but also makes it easy to pull out a whole category of items at once. For even better access, you can add freestanding pull-out drawers that sit directly on the shelves. This brings everything from the back into full view with a simple tug, making it a true game-changer for lower shelves where things tend to get lost. These small adjustments can transform standard wire shelving into a highly organized and efficient system.

Why You Need Adjustable Shelving

Your storage needs will change over time, and your pantry should be able to adapt. Fixed shelves can be limiting, leaving you with wasted space or forcing you to store items awkwardly on their sides. Adjustable shelving offers the ultimate flexibility, allowing you to customize the height between shelves to perfectly fit tall cereal boxes, small appliances, or stacks of serving platters. Before you commit to a layout, take a quick inventory of your largest pantry items. This simple step ensures your new pantry design can accommodate everything from day one, giving you a system that truly works for you.

Choose Surfaces That Are Easy to Clean

A pantry is a workhorse, so its surfaces need to be resilient. Spills from olive oil, honey, or flour are inevitable, which makes easy-to-clean materials a must. Consider extending the same durable materials from your kitchen into the pantry, such as quartz countertops and high-quality cabinetry. This approach creates a cohesive and polished look while ensuring your pantry can handle daily wear and tear. Using strong, non-porous materials means you can spend less time worrying about maintenance and more time enjoying your beautifully organized space. It’s a practical choice that supports a functional kitchen layout.

Use Baskets and Bins to Tame Clutter

Deep shelves often become a black hole where items at the back are forgotten. Pull-out storage is the perfect solution. Features like sliding shelves, wire baskets, and deep drawers bring everything into view, so you can quickly find what you need without rummaging. This is especially effective for lower cabinets, where it can be difficult to see and reach items. By incorporating pull-out shelves, you make every inch of your pantry accessible and easy to organize. It’s a simple feature that dramatically improves the pantry’s day-to-day usability.

Use a Mix of Container Types

A truly organized pantry uses a thoughtful mix of containers to suit different needs. Think of it as curating a collection that is both functional and beautiful. For items that need to stay fresh, like flour, cereal, and snacks, use airtight pop-top containers. They keep food fresh and create a clean, uniform look. For packaged goods or produce like onions and potatoes, open plastic or wire bins work well, allowing for easy visibility and airflow. To conceal bulkier items or add a touch of warmth, use woven baskets made from materials like water hyacinth. For a streamlined aesthetic, try dedicating each shelf to one type of container. This creates visual harmony and makes the entire space feel intentional and well-designed.

Find Creative Solutions for Odd Items

Every pantry has a few tricky items that don’t fit neatly into standard containers. This is where a little creativity makes a big difference. For example, you can turn a woven basket on its side to create a stylish holder for reusable grocery bags, keeping them contained yet accessible. For items you don’t use often that are stored on high shelves, use open-top bins with handles. This simple solution allows you to safely pull down what you need without fumbling with individual items. Addressing these unique storage challenges is what transforms a standard pantry into a space that feels truly customized to your life.

Should You Add a Pantry Countertop?

Including a dedicated countertop can transform your pantry from a simple storage area into a multi-functional prep zone. This surface provides a convenient spot to unload groceries, decant goods into containers, or keep small appliances like a stand mixer or coffee maker off your main kitchen counters. A pantry with a countertop workspace can also serve as a hidden coffee bar or a staging area for entertaining. It’s a touch of luxury that adds immense practicality, turning your pantry into a valuable extension of your kitchen.

A Simple Pantry Design That’s Also Stylish

A pantry should be more than just a place to store food; it should be a seamless extension of your kitchen’s design. Blending style with function means creating a space that is not only impeccably organized but also visually stunning. Think of it as a small room that deserves the same design attention as the rest of your home. When every element is chosen with intention—from the color on the walls to the material of the shelves—your pantry becomes a source of calm and inspiration rather than a cluttered closet you hide behind a closed door.

The key is to approach the design with a dual mindset: how will this look, and how will this work for my lifestyle? A beautiful pantry with impractical shelving is just as frustrating as a functional but uninspired one. The goal is to strike the perfect harmony where elegant aesthetics support effortless usability. This means selecting materials that are both durable and beautiful, choosing a color palette that feels cohesive with your kitchen, and arranging everything in a way that feels balanced and intuitive. A truly well-designed pantry doesn’t just store your ingredients; it simplifies your daily routines and makes the act of cooking more enjoyable.

Pick a Calming Color Palette

Color is one of the most powerful tools for transforming a pantry from a purely utilitarian space into a designed one. To create a sense of openness and cohesion, extend your kitchen’s color palette into the pantry. Lighter colors like soft whites, taupes, and light grays are excellent choices because they reflect light and can make even a small pantry feel more spacious and airy. For a touch of drama and sophistication, you can introduce bold accents. Consider adding contrast with details like matte black handles, a richly colored backsplash, or even a single, beautifully wallpapered accent wall. This approach ensures the pantry feels like a thoughtful, integrated part of your home.

Consider a Moody, Dark Palette

While a light and airy pantry is a classic choice, there’s something incredibly chic about embracing a darker, moodier palette. Think of it as a hidden jewel box in your home. A deep, saturated color like charcoal gray, rich navy, or forest green can turn a simple storage space into a sophisticated statement. This approach works especially well in smaller, enclosed pantries, where a dark color creates a sense of depth and intention. As designer Emily Henderson notes, a dark blue pantry can be a “pleasant surprise” and has the practical benefit of helping to hide the visual noise of colorful food packaging, creating an instantly calmer, more curated look.

Add Character with Repurposed Items

A truly custom space tells a story, and one of the best ways to do that is by incorporating unique, repurposed elements. This is where your pantry can take on a life of its own, reflecting your home’s history and your personal style. It could be something as simple as using a vintage piece of furniture for storage or as integrated as repurposing original house windows to frame the pantry doorway, a detail that adds instant architectural interest. These thoughtful touches prevent a new design from feeling sterile and infuse it with a sense of soul and character that you can’t buy off the shelf. Exploring architectural salvage can uncover one-of-a-kind pieces that make your pantry truly yours.

Embrace Popular Design Trends

The best design trends are the ones rooted in pure functionality, and the pantry is the perfect place to put them to work. One of the most impactful trends is decanting dry goods into uniform, clear containers. This isn’t just about achieving a certain aesthetic; it’s about creating a system that works. As noted by Design Enthusiasm, “Using clear containers creates a cohesive, organized look that instantly calms the visual clutter of mismatched packaging.” This simple act makes it easy to see your inventory at a glance, which helps reduce food waste and simplifies grocery shopping. It’s a trend with true staying power because it makes daily life easier.

Common Materials and Finishes

The materials you choose for your pantry are just as important as its layout. They need to be durable enough to withstand daily use while complementing the style of your kitchen. Natural woods like white oak and walnut bring warmth and texture to shelving, while high-quality laminates offer a resilient and easy-to-clean alternative. For countertops, extending the same quartz or natural stone from your kitchen creates a seamless, high-end feel. Finally, don’t overlook the hardware. Cabinet pulls and drawer handles in finishes like matte black or unlacquered brass can add a final, polished touch. “Choosing the right components ensures your pantry can handle daily life while reflecting the sophisticated aesthetic of your home.”

Think Beyond the Pantry with a Scullery

For those who love to entertain, a scullery—also known as a butler’s pantry—is the ultimate luxury. This secondary space functions as a hardworking support station for your main kitchen. It’s the perfect place for a second sink, an extra dishwasher, or small appliances, keeping the mess and clutter out of sight. As Emily Henderson points out, a separate scullery “can be ideal for dirty dishes and cleanup, keeping the main kitchen clean for serving.” This allows your primary kitchen to remain a beautiful, uncluttered space for guests to gather, while all the prep and cleanup happens discreetly behind the scenes. It’s a thoughtful design solution that blends practicality with effortless elegance, transforming how you use your kitchen.

Find Bins and Jars You Love

The materials you choose are fundamental to achieving a high-end look that is also practical. Opt for surfaces that are durable and easy to clean, such as quartz or sealed wood for countertops and shelves. These materials stand up to daily use while adding a touch of elegance. Don’t be afraid to mix textures to create visual interest; the interplay between smooth glass jars, warm wood shelves, and sleek metal baskets can feel incredibly modern and sophisticated. By selecting high-quality, visually appealing materials, you ensure your pantry is not only beautiful on day one but remains so for years to come.

Arrange Items for Visual Balance

The ultimate goal is to create a space that feels perfectly balanced between beauty and utility. A well-designed pantry isn’t just about looking good—it’s about making your life easier. When everything has a designated place and is easy to see and reach, you save time, reduce food waste, and find more joy in your daily cooking rituals. This sense of order and effortless access is the true definition of luxury in design. By thoughtfully planning the layout and organization, you create a harmonious flow that turns a simple storage area into a cornerstone of a functional and beautiful kitchen.

How to Create Pantry Zones That Actually Work

A truly functional pantry is organized by logic, not just by chance. Creating specific zones for different categories of food is the secret to maintaining order and making your kitchen routine feel effortless. When you assign a home to every item, you can see what you have at a glance, which simplifies meal prep and grocery shopping. As experts in pantry design point out, a lack of clear spots for food often leads to buying things you already have and creating unnecessary waste. By thinking like a merchandiser and grouping similar products, you can transform your pantry into a beautifully efficient space.

The Dry Goods Zone: Pasta, Rice, and Grains

Your dry goods zone is for everyday staples like pasta, rice, grains, beans, and breakfast cereals. The key here is to get everything out of its bulky, mismatched packaging and into uniform, clear containers. This not only keeps food fresher for longer but also creates a clean, cohesive look. Group similar items together—all baking supplies on one shelf, all grains on another. You can use stylish bins or baskets to corral smaller packages like spice mixes or tea boxes. Don’t forget to add labels to your shelves and containers to keep the system easy for everyone in the family to follow.

The Canned Goods Corner

Canned goods can easily become a source of clutter, getting lost in deep shelves until they expire. To avoid this, dedicate a specific area just for cans and jars. Tiered shelving or can risers are fantastic solutions because they allow you to see every label without having to dig through rows of items. Arrange them by category: soups and broths together, canned vegetables in another section, and so on. For a truly seamless system, organize them with the earliest expiration dates at the front. This simple practice ensures you’re rotating your stock properly and minimizing food waste.

A Grab-and-Go Snack Station

If you have kids—or just love a good snack—a designated snack zone is a game-changer. This area makes it easy for everyone to find what they’re looking for without rummaging through the entire pantry. Use open-front bins or low baskets on an easily accessible shelf to hold items like granola bars, fruit snacks, crackers, and nuts. A great tip is to keep healthy snacks at eye level to encourage better choices. This zone simplifies packing lunches and provides a quick, organized solution for after-school hunger pangs, all while keeping your pantry looking tidy.

Create a “Morning Wall” for Kids

Designing a pantry that works for the entire family can make a huge difference in your daily routine, especially when it comes to kids. A great way to do this is by creating a “Morning Wall”—a dedicated space where children can easily grab their own breakfast essentials. This simple design strategy helps foster independence and encourages healthy eating habits from a young age. It turns a potential point of morning chaos into a smooth, self-sufficient process for them.

To set up a “Morning Wall,” focus on these key elements:

  1. Place Items at Their Level: Store everyday breakfast foods like cereals, oatmeal, and healthy snacks on lower shelves where kids can see and reach them without help. As we discussed in our action plan for an organized pantry, placing everyday items at eye level makes them the most convenient option, and the same principle applies here—just adjust for a child’s height.
  2. Use Clear, Accessible Containers: Decanting dry goods into clear, uniform containers isn’t just about aesthetics; it allows kids to see their options at a glance. This visual cue helps them make choices easily and also helps you keep track of what needs refilling, which cuts down on food waste.
  3. Designate a Kid-Friendly Zone: Carve out a specific section of the pantry just for them. Fill it with pre-approved snacks and breakfast choices. This empowers them to make their own decisions within the boundaries you’ve set, giving them a sense of ownership and responsibility over their morning routine.
  4. Label Everything Clearly: Labels are essential for keeping the system organized. Use fun, easy-to-read labels on bins and containers so kids know exactly where to find things and, more importantly, where to put them back. This small step is key to maintaining order long-term.

By setting up a “Morning Wall,” you streamline your mornings and teach your children valuable life skills, making them active participants in the daily flow of your home.

Your Go-To Baking Nook

For anyone who loves to bake, creating a dedicated baking corner is pure joy. Consolidate all your baking essentials—flour, sugar, baking soda, vanilla extract, sprinkles, and chocolate chips—into one convenient spot. Decanting ingredients like flour and sugar into large, clear, airtight containers not only looks beautiful but also makes it easy to see when you’re running low. Using containers that look similar will give your pantry a polished, uniform appearance. Keep your measuring cups, spoons, and other small baking tools in a nearby drawer or a container within the zone for ultimate efficiency.

Incorporate Specialized Storage

A truly exceptional pantry anticipates your needs with custom solutions that go beyond standard shelving. This is where a storage space transforms into a feature tailored specifically to your lifestyle, whether it’s a dedicated spot for your stand mixer or an elegant way to display your wine collection. These thoughtful additions are what make a space feel truly personal and luxurious. By planning for the specific items you own and use, we can create a pantry that not only looks beautiful but also makes your daily routine feel more seamless and organized. It’s about designing a space that works intuitively for you, removing small points of friction from your day.

Add Pull-Outs for Heavy Appliances

Instead of tucking heavy appliances like a stand mixer or food processor away in a deep, low cabinet, imagine a sturdy shelf that glides out to meet you. These reinforced pull-outs are designed with high-quality hardware to handle significant weight, making it effortless to access and use your favorite kitchen tools. This simple feature not only saves you from awkward bending and lifting but also keeps your main countertops clear and uncluttered. It’s a perfect example of how smart, ergonomic design can make your kitchen more functional and enjoyable to use every single day, blending high-end engineering with practical luxury.

Designate Space for Wine Storage

If you enjoy wine, integrating storage into your pantry is a sophisticated and practical choice. A cool, dark pantry can be an ideal environment for a small collection, keeping your bottles properly stored and ready for any occasion. This doesn’t require a full wine cellar; it can be as simple as a set of built-in diamond bins or a sleek, wall-mounted rack that turns your bottles into a design feature. For the serious collector, we can even integrate a small, temperature-controlled wine fridge. Having a designated spot keeps your wine organized and protected, adding a personal and luxurious element to your pantry design.

Pantry Lighting Ideas That Make a Difference

Proper lighting is one of the most impactful elements of pantry design. It’s about more than just finding the paprika; it’s about creating a space that feels clean, organized, and inviting. The right lighting strategy can transform a dark closet into a functional and beautiful extension of your kitchen. Dark corners make it difficult to see what you have, leading to forgotten items and unnecessary purchases. By layering different types of light, you can ensure every shelf is perfectly visible, making your daily routine smoother. Let’s explore a few smart ways to illuminate your pantry for maximum function and style.

Add LED Strips Under Shelves

If you want to instantly upgrade your pantry, install LED strip lights under each shelf. This is a game-changer for visibility. A single overhead fixture often casts shadows on lower shelves, leaving you to guess what’s hiding in the back. Strip lighting solves this by directly illuminating the items on every level, from top-shelf spices to baskets on the floor. They provide a clean, even glow that not only makes it easy to find what you need but also gives your pantry a high-end, custom look. It’s a simple addition that delivers a significant improvement in both function and aesthetic appeal.

Try Motion-Activated Lights for Convenience

For ultimate convenience, motion-activated lights are a brilliant solution, especially for walk-in pantries. Imagine walking into your pantry with your hands full and having the lights turn on automatically—it’s a small luxury that makes a big difference. These sensors eliminate the need to fumble for a switch, ensuring the space is lit exactly when you need it and saving energy by turning off when you leave. This type of smart lighting enhances visibility and adds a touch of modern efficiency to your home, streamlining your routine and making your pantry more accessible and user-friendly.

Choose a Bright Overhead Light

While under-shelf lighting targets specific areas, a great overhead fixture is essential for overall illumination. This is your foundational layer of light, responsible for brightening the entire space so no corner is left in the dark. A well-placed flush mount or recessed lighting can make the whole pantry feel more open and organized. For an even more integrated approach, consider smart overhead lighting that you can control with your voice or phone. This allows you to adjust brightness levels and ensure your pantry is always perfectly lit, whether you’re quickly grabbing a snack or taking a full inventory.

Keeping Your Pantry Organized for Good

A beautifully designed pantry is a joy, but its true value lies in its ongoing function. Keeping it organized doesn’t require a complete overhaul every month. Instead, it’s about creating simple, sustainable habits that preserve the order and flow you’ve worked so hard to establish. A little bit of regular maintenance ensures your pantry remains a cornerstone of an efficient and elegant kitchen, saving you time and making meal preparation a seamless experience. By integrating a few key routines into your schedule, you can keep your custom pantry looking and functioning as perfectly as the day it was completed.

Schedule a Quick Weekly Tidy-Up

A well-designed pantry saves time, reduces food waste, and makes cooking more enjoyable, but only if it stays organized. The key is consistency. Set aside time on your calendar—perhaps once a season or every six months—for a quick decluttering session. During this time, pull out items and check expiration dates. Get rid of anything that’s past its prime and donate unopened, non-perishable items you know you won’t use. This is also a great opportunity to reassess your system. Are your zones still working for your family’s needs? A regular pantry audit keeps things from getting out of hand and ensures your space continues to serve you well.

Take Stock Before You Shop

How many times have you returned from the grocery store only to find you already had three cans of diced tomatoes? An inventory system puts an end to accidental over-buying. This doesn’t have to be complicated. A small whiteboard on the pantry door or a running list in your phone’s notes app can work wonders. For a more streamlined approach, you can use apps to help you make grocery lists and keep track of what you have. By knowing exactly what’s on your shelves, you’ll not only keep your pantry tidy but also make your shopping trips more efficient and cost-effective.

Buy Multiples of Frequently Used Items

This might sound counterintuitive when you’re trying to declutter, but for the staples you use all the time, buying in multiples is a brilliant strategy. Storing several identical bottles of olive oil or boxes of pasta next to each other creates a clean, uniform look that is incredibly calming and visually appealing. It transforms your pantry from a chaotic mix of packaging into a curated, shop-like display. This approach not only looks great but also simplifies your life. You’ll always have your go-to ingredients on hand, which makes meal planning easier and reduces last-minute trips to the store. It’s a simple way to maintain a tidy look while ensuring your kitchen is always well-stocked and ready for anything.

Wipe Down Shelves Regularly

Even the most organized pantry needs a good cleaning now and then. Spills happen, and dust accumulates. For a deep clean, it’s best to start by taking everything out of your pantry and giving the shelves a good wipe-down. This is also the perfect time to clean the outside of your containers and bins before putting everything back in its designated spot. For weekly maintenance, simply spot-clean any spills and do a quick sweep of the floor. Establishing this simple routine prevents small messes from becoming big projects and keeps your pantry feeling fresh, clean, and ready for your next culinary creation.

Frequently Asked Questions

What’s the first step I should take when planning a pantry redesign? Before you think about materials or colors, start by taking a complete inventory of what you actually store. Group everything into categories like baking, weeknight meals, snacks, and bulk items. This process shows you what you have too much of and what kind of storage you truly need. Understanding your own habits and inventory is the foundation for creating a pantry that is genuinely functional for your household.

How deep should pantry shelves be? For most items, a shelf depth of 12 to 16 inches is ideal. This is deep enough to hold canisters and boxes but shallow enough that items won’t get lost in the back. If you have a deeper space, I strongly recommend installing pull-out drawers or shelves. This makes the entire depth of the shelf accessible, so you can see and reach everything you own without having to dig.

Is it worth decanting dry goods into separate containers? Absolutely. While it may seem like an extra step, decanting items like pasta, grains, and cereal into clear, airtight containers is one of the most effective changes you can make. It creates a clean, uniform look that reduces visual clutter, keeps your food fresher for longer, and allows you to see your inventory at a glance. This simple habit helps prevent you from buying duplicates and makes your pantry feel much more organized.

How can I make a small pantry feel more spacious and luxurious? The key is to use smart design choices that create a sense of openness and quality. Stick to a light, cohesive color palette that connects to your kitchen, as this will make the space feel larger. Great lighting is also essential; adding LED strips under each shelf eliminates shadows and makes the pantry feel bright and clean. Finally, invest in high-quality storage solutions, like matching containers and sturdy baskets, to create a polished, intentional look.

What’s the best way to maintain an organized pantry long-term? The secret to lasting organization is building simple habits. First, always put groceries away in their designated zones immediately. Second, keep a running shopping list on a small whiteboard inside the pantry door or on your phone to track what you need. Finally, schedule a quick 15-minute tidy-up once a month to wipe down shelves, check expiration dates, and put any stray items back in their proper home. Consistency is what turns a beautiful design into a functional system that lasts.

Pantry Safety and Best Practices

Beyond aesthetics and organization, a truly well-designed pantry prioritizes safety. Creating a space that is not only beautiful but also secure is a hallmark of thoughtful design. These simple best practices ensure your pantry is a safe and functional environment for everyone in your household, preventing common accidents and giving you peace of mind. By integrating these considerations into your pantry’s layout and your daily routines, you can maintain a space that is as safe as it is stylish, ensuring it supports your lifestyle in every possible way.

Keep the Floor Clear

A clear floor is the foundation of a safe and functional pantry. It’s easy to let bulk items like cases of water or bags of pet food pile up, but this creates tripping hazards, especially when you’re carrying an armful of groceries. To maintain a safe walkway, designate a specific home for these items. Low, pull-out shelving or sturdy, attractive bins are perfect for keeping them contained and off the main path. This simple practice not only prevents accidents but also makes cleaning the floor much easier and preserves the clean, uncluttered aesthetic of your beautifully designed space. It’s a small rule that makes a significant difference in daily use.

Keep a Step Stool Handy

Making use of vertical storage is smart, but accessing those top shelves safely is critical. Resist the temptation to grab a dining chair or balance precariously on a counter. Instead, invest in a sturdy, lightweight step stool and give it a dedicated home inside your pantry. A slim, foldable model can be hung on a wall hook or tucked into a narrow space between shelving units. The key is to make it easily accessible; if it’s convenient to grab, you’re more likely to use it. This ensures you can safely reach every item in your pantry, turning high shelves into valuable, usable storage instead of a risky no-go zone.

Store Cleaning Products Separately

Your pantry is for food, and it’s essential to keep it that way. Storing cleaning products alongside edible items poses a serious risk of cross-contamination from leaks or spills. To ensure your family’s safety, designate a completely separate area for all household chemicals. This could be under a kitchen or laundry room sink, or in a dedicated cabinet away from the pantry. If you must store them in the same room, use a sealed, labeled bin on the lowest possible shelf, far from any food products. Following proper guidelines for chemical storage is a non-negotiable part of creating a truly thoughtful and secure home environment.

Related Articles

Get a Quote for Your Project. Click Here.